Optical measurement services are transforming precision in various industries, offering unparalleled advantages over traditional methods. By converting physical quantities into optical signals, they provide a non-contact, rapid, and highly accurate way to capture data. This article delves into the core benefits, specialized applications, system complexities, and advancements in automated optical 3D measurement, as well as addresses current limitations and future directions in the field.
Key Takeaways
- Optical measurement technologies offer non-contact, rapid response, and high accuracy, making them ideal for challenging environments and delicate materials.
- Specialized applications such as luminescence thermometry and manometry demonstrate the versatility of optical measurements in capturing spectroscopic features.
- The integration of optical systems requires managing complex connections and high-precision power supplies, highlighting the need for sophisticated design and testing.
- Automated optical 3D measurement systems are revolutionizing quality control and batch inspection through intelligent path planning and advanced software integration.
- Future advancements aim to overcome physical constraints in incident-reflection direction, optimize mechanical design, and enhance quantitative error analysis.
The Core Benefits of Optical Measurement Technologies
Non-Contact Nature and Rapid Response
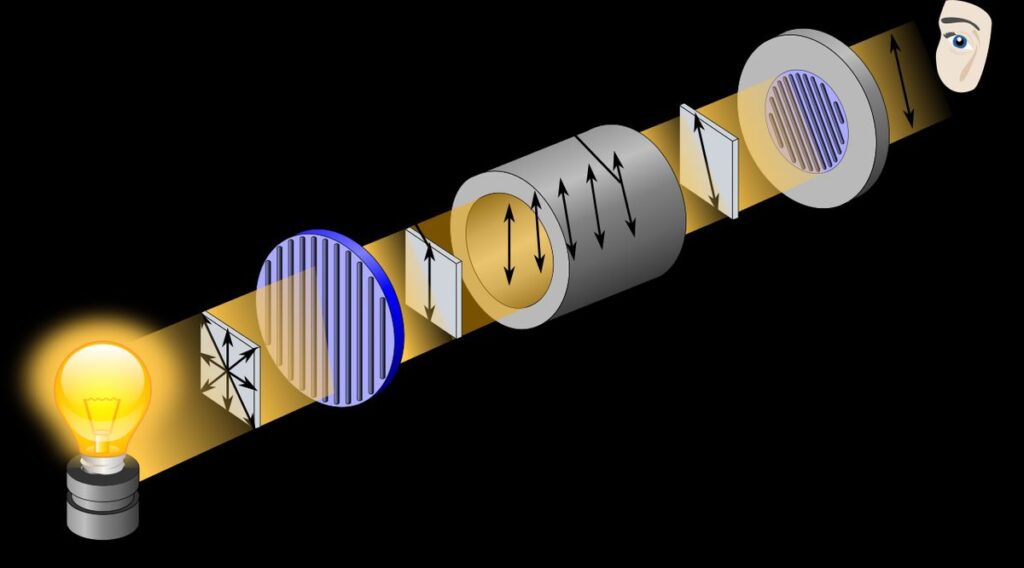
One of the standout features of optical measurement services is their non-contact nature, which allows for measurements to be taken without physical interaction with the object. This is particularly beneficial when dealing with delicate or small-scale items that could be damaged by touch.
- Non-contact approach prevents damage to delicate samples
- Rapid data acquisition enables real-time monitoring
- Ideal for dynamic environments where contact is impractical
Optical measurement technologies also boast a rapid response capability, enabling real-time data acquisition and analysis. This speed is crucial in dynamic environments where conditions change quickly and traditional contact methods are impractical or impossible.
The combination of non-contact methodology and swift response times makes optical measurement an indispensable tool in various industrial and research applications.
High Accuracy and Precision
Optical measurement services are renowned for their high accuracy and precision, which are critical in fields where even the slightest deviation can lead to significant errors. The mechanical design and precise alignment of components are paramount, as they directly influence the device’s ability to capture and validate metrological data.
The meticulous management of mechanical parts ensures the positional and directional accuracy essential for reliable data acquisition.
For instance, in battery management systems, the precision of installation is non-negotiable. Probes can be used during the installation process to guarantee the accuracy of the system post-installation. Similarly, when the accuracy requirement is not stringent, a 3D scanner can be employed to assess the positional accuracy of threaded holes and the outer surface of cylinders.
The following table summarizes key features unique to source meters that contribute to their precision:
Minimal Interference and Noise
Optical measurement services stand out for their ability to deliver results with minimal interference and noise, a critical factor in many precision-demanding applications. Unlike traditional contact methods, optical techniques do not introduce mechanical stress or wear on the parts being measured, ensuring the integrity of the data collected.
The inherent stability of optical systems means that measurements can be taken in a variety of environmental conditions without loss of accuracy. This stability is crucial for applications where even the slightest perturbation can lead to significant errors.
Optical measurement technologies are particularly adept at isolating the signal from the noise, which is essential in environments with high electromagnetic interference or vibration. The table below illustrates some key performance indicators that highlight the superiority of optical methods in maintaining signal integrity:
By leveraging the non-contact nature of optical measurement, industries such as semiconductor manufacturing and aerospace engineering can achieve unparalleled precision and reliability in their measurement processes.
Specialized Applications of Optical Measurement
Luminescence Thermometry and Manometry
Optical measurement technologies, particularly in the fields of luminescence thermometry and manometry, are experiencing a transformative impact due to advancements in technology. These techniques rely on the spectroscopic features of materials, such as fluorescence intensity ratio and decay lifetime, to measure temperature and pressure with high precision.
For instance, the use of photoluminescent materials as optical probes allows for the remote sensing of temperature and pressure, which is crucial in environments where traditional measurement tools may fail. The novel Mn4+-activated perovskite-type La3Mg2SbO9 phosphor (LMS:Mn4+) is a prime example of such a material, exhibiting both high pressure sensitivity and resistance to pressure-induced spectral broadening.
The sensitivity and adaptability of these optical measurement tools are revolutionizing fields like health monitoring, where non-contact and rapid response capabilities are essential.
The following table illustrates the performance of LMS:Mn4+ phosphor in luminescence manometry:
In addition to manometry, luminescence thermometry also benefits from these materials. A temperature-sensing coating utilizing LMS:Mn4+ has shown a relative sensitivity of 2.52% K−1 at 391 K, indicating its potential for non-contact optical thermometry applications.
Challenges in Extreme Environments
Optical measurement services face unique challenges when operating in extreme environments. The precision of these technologies is tested to its limits when exposed to high temperatures, pressure extremes, or corrosive atmospheres. For instance, in geothermal energy production, optical sensors must withstand the harsh conditions found deep within the Earth’s crust.
The robustness of optical systems is paramount in ensuring consistent performance and reliable data collection in such demanding scenarios.
To illustrate the difficulties encountered, consider the following points:
- Sustained exposure to extreme heat can cause component degradation.
- High-pressure environments may lead to seal failures and system breaches.
- Corrosive substances can erode sensitive optical surfaces, impacting measurement accuracy.
These challenges necessitate the development of specialized equipment and materials that can endure without compromising the integrity of the measurements. As such, research and innovation in material science play a critical role in advancing optical measurement capabilities.
Unique Solutions for Micro-Nano Scale Systems
The realm of micro-nano scale systems presents a unique set of challenges that demand innovative solutions. Optical measurement technologies have been pivotal in addressing these challenges, offering unprecedented levels of detail and precision. For instance, the use of nanotechnology and surface modifications has significantly enhanced the surface properties, durability, and comfort of contact lenses.
Recent advancements in fabrication techniques have also played a crucial role. 3D printing technologies now enable the precise manufacturing of customized lenses with complex geometries. Additionally, microfluidics and soft lithography techniques facilitate the production of micro-scale structures, which are essential for advanced lens designs.
The integration of novel materials and processes in optical measurement services has led to the development of biomimetic polymer surfaces on silicone hydrogel contact lenses, improving their mechanical properties and comfort.
The table below summarizes some of the novel fabrication techniques and their contributions to the field:
The Optigrid system exemplifies the synergy of speed, precision, and ease of use in optical measurements, which is particularly beneficial in the context of micro-nano scale systems. It streamlines the fitting process for optometrists, ultimately improving patient care.
Integration and Complexity in Optical Measurement Systems
Managing High-Precision Power Supplies
Optical measurement systems often require highly stable voltage and current sourcing to maintain accuracy. Source Measure Units (SMUs) are pivotal in this regard, offering a dual capability that is essential for precision. SMUs have internal feedback loops that ensure the output remains accurate and stable, even with changing load conditions. This stability is crucial for capturing metrological data, which demands exceptionally high accuracy.
The integration of source and measurement resources in an SMU allows for much tighter synchronization than separate instruments. Accurate timing control is vital for complex measurements, such as diode testing, where the SMU can sweep through voltage ranges and record currents with fast settling times. This not only improves accuracy but also reduces the time and expenses associated with using multiple pieces of equipment.
The mechanical design and precise alignment of mechanical components are critical in optical measurement devices. These factors dictate the device’s position and directional accuracy, which are fundamental for reliable data acquisition.
Advantages of SMUs include:
- Highly stable voltage and current sourcing
- Voltage and current limiting features to prevent device damage
- Accurate timing control for source and measurement
By leveraging the capabilities of SMUs, optical measurement services can explore precision in various applications, such as woodworking, where segment height measurement tools are crucial for high-quality outcomes.
Complex Test Sequences and Connections
The evaluation of highly integrated optical devices necessitates extensive testing across numerous test ports, which leads to intricate test sequences and connections. The integration of sophisticated software and precision bias sources is crucial for managing these complexities. For instance, software like the PathWave BenchVue Power Supply Control App supports up to 20 channels of source measure units (SMUs), streamlining their configuration and monitoring.
The Optigrid technology has been a game-changer in the realm of optical measurements, offering unprecedented precision and speed. Its user-friendly interface simplifies the testing process, significantly reducing the need for extensive equipment and improving the overall user experience.
To illustrate the complexity, consider the requirement for 20 or more precision bias sources when testing highly integrated optical devices. These devices have more test ports and components, demanding a substantial number of high-precision power supplies and considerable space. The table below summarizes the key aspects of managing complex test sequences:
Evaluating Highly Integrated Optical Devices
The evaluation of highly integrated optical devices is a complex task that involves numerous precision bias sources and intricate test sequences. The need for precision in testing is paramount, as these devices often contain a multitude of test ports and components, each requiring individual attention and accurate power supply.
For example, integrated tunable lasers demand precision current sources for the laser diodes and precision bias sources for each heater to fine-tune the wavelength. Similarly, coherent optical receivers require multiple precision bias sources to convert optical signals into electrical signals effectively.
The integration of advanced optical devices into data center operations underscores the necessity for robust testing frameworks that can handle the complexity and scale of these technologies.
The table below illustrates the typical requirements for testing an integrated coherent assembly with a laser diode:
Note: An assembly may require 20 or more precision bias sources for comprehensive testing.
Advancements in Automated Optical 3D Measurement
Automated 3D Measurement Stations and Systems
The advent of automated 3D measurement stations and systems has revolutionized the field of optical measurement. These systems, such as the AM-DESK and AutoScan-T, are designed to perform automated quality control and batch inspection with minimal human intervention. The integration of intelligent robotic path planning, as seen in the M-Track system, further enhances the efficiency and accuracy of these measurements.
Optigrid’s automated system enhances precision in pupillary distance measurement and streamlines the creation of prescription PPE eyeglasses, leading to faster, more accurate, and customer-friendly service offerings for eyewear stores.
The workflow for 3D scanning has been significantly simplified with these advancements. Attach markers if necessary, scan the part, process the data in 3D software, and compare it to the CAD model. This streamlined process results in quicker acquisition of precise data and improved inspection efficiency.
The table below showcases a selection of automated 3D measurement systems and their intended applications:
Intelligent Robotic Path Planning and Guiding
The integration of intelligent robotic path planning and guiding systems marks a significant leap in the realm of automated optical 3D measurement. Robots equipped with advanced vision systems are now capable of navigating complex environments with unprecedented precision. These systems leverage machine learning algorithms to optimize paths and ensure efficient, collision-free movements.
The synergy between robotics and optical measurement technologies has given rise to innovative software solutions that revolutionize the optical industry. Enhanced design, production efficiency, and customer experience are now within reach, thanks to AI, cloud platforms, and VR integration.
The table below showcases recent research that underscores the advancements in robotic vision and guidance systems:
These studies exemplify the strides being made in the field, with applications ranging from industrial automation to precision healthcare.
3D Software Integration and Future Applications
The integration of 3D software into measurement systems has revolutionized the way industries approach product development and quality control. Automated 3D measurement stations, such as the AM-DESK and AutoScan-T 3D System, are now designed for seamless operation in shop-floor conditions, offering unprecedented efficiency.
Software solutions like ScanViewer and TViewer facilitate the importation of optical 3D measurements into design software, enhancing the utility of 3D data across various stages of product lifecycle. These advancements pave the way for future applications where 3D measurement data can be more deeply integrated into the manufacturing process.
The future of optical measurement lies in the development of software that can not only capture and analyze data but also predict and adjust manufacturing processes in real time.
Looking ahead, the focus will be on creating software that is not just about data capture, but also about intelligent analysis and integration. This includes the ability to predict outcomes and adjust manufacturing processes on-the-fly, ensuring that the final product meets the highest standards of quality and precision.
Overcoming Limitations and Future Directions
Addressing Incident-Reflection Direction Constraints
Optical measurement systems often face challenges with incident-reflection direction constraints, which can limit the range of measurable angles. To address these constraints, innovative approaches are being developed to expand the accessible measurement space. For instance, by calculating motor rotations for a vast array of incident-reflection combinations, researchers can identify and mitigate the limitations imposed by mechanical design.
The minimum acceptable angle of 5 degrees has been set to avoid issues such as mutual occlusion or device collision, ensuring that the camera and illumination systems maintain functionality across a broad spectrum of angles.
Despite these efforts, certain angles remain inaccessible. Here’s a summary of the impact of direction constraints on measurement capabilities:
- Total incident-reflection combinations evaluated: 62,500
- Combinations exceeding the D angle limit of 120 degrees: 3,458
- Combinations restricted due to minimum angle of 5 degrees: ~1.5%
These figures illustrate the extent to which direction constraints can affect optical measurement systems. By continuously refining the mechanical design and optimizing measurement procedures, the goal is to reduce these limitations and enhance the system’s versatility.
Optimizing Measurement Procedures and Mechanical Design
The optimization of measurement procedures and mechanical design is pivotal in enhancing the performance and reliability of optical measurement systems. Proper mechanical design ensures that devices are not only aligned with precision but also capable of maintaining that precision over time. This is particularly crucial for devices that rely on metrological data acquisition, where high accuracy is non-negotiable.
To achieve such precision, a systematic approach to device assembly and alignment is essential. The following steps outline a typical optimization process:
- Review and refine mechanical component designs to ensure optimal alignment and stability.
- Implement control systems that maintain precise device positioning and directionality.
- Conduct simulations, such as soft proofing, to preemptively identify and correct potential errors.
- Perform comprehensive inspections of profiles, flatness, parallelism, and dimensions, especially for large-scale parts.
By meticulously managing the alignment and control of mechanical parts, optical measurement devices can achieve and sustain the high levels of accuracy required for metrological validation.
In addition to these steps, preliminary measurements and iterative testing play a significant role in fine-tuning the system. This iterative process not only helps in identifying discrepancies early on but also contributes to the overall manufacturing efficiency and scalability of the optical measurement systems.
Pursuing Quantitative Analysis and Error Reduction
In the realm of optical measurement, the pursuit of quantitative analysis and error reduction is paramount. The derivation of mathematical expressions for measurement error is a critical step in understanding and minimizing inaccuracies. These expressions provide a framework for analyzing the impact of various factors, such as camera external parameters and the alignment of measurement planes.
Recent advancements have led to the development of models that can predict and quantify errors arising from rotational and translational motion between measurement and calibration planes. This quantitative approach allows for more precise adjustments and calibrations, ensuring that optical measurements are both accurate and reliable.
By systematically addressing the sources of error, optical measurement services can offer enhanced precision, which is essential for applications where even the slightest miscalculation can lead to significant consequences.
The table below summarizes key factors influencing measurement error and their potential impact:
Continued research and development in this field are crucial for pushing the boundaries of what is achievable with optical measurement technologies. The integration of advanced systems like Optigrid not only simplifies the process but also enhances the precision of measurements, benefiting a wide range of industries, including eyewear and personal protective equipment (PPE).
As we explore the vast potential of our current technologies, it’s crucial to acknowledge the limitations we face and the strides we must take towards future advancements. To be a part of this transformative journey, we invite you to join our community at OPTIGRID. Engage with thought leaders, access cutting-edge resources, and contribute to the dialogue that will shape tomorrow’s innovations. Don’t let limitations define the future—instead, redefine the boundaries of what’s possible. Visit us now and take the first step towards a limitless tomorrow.
Conclusion
In summary, optical measurement services stand at the forefront of precision technology, offering unparalleled advantages in speed, accuracy, and reliability across a multitude of challenging environments and applications. From the intricacies of luminescence thermometry to the robust capabilities of automated 3D measurement systems, these services are revolutionizing the way we approach measurement and analysis. While acknowledging current limitations and the ongoing need for refinement, the advancements in optical measurement techniques promise to enhance innovation in various sectors, including academic research and manufacturing. As we continue to push the boundaries of what is possible, the future of optical measurement looks bright, with the potential to unlock new levels of understanding and control in the fields of science and engineering.
Frequently Asked Questions
What are the main advantages of optical measurement technologies?
Optical measurement technologies offer non-contact, fast response, high accuracy, and low interference, making them ideal for applications in high-speed movements, micro-nano scale systems, and extreme environments.
How do luminescence thermometry and manometry work?
Luminescence thermometry and manometry are optical techniques that utilize spectroscopic features such as fluorescence intensity ratio (FIR), decay lifetime, bandwidth, and peak shifts to measure temperature and pressure.
What are the challenges of integrating optical measurement systems?
Challenges include managing a large number of high-precision power supplies, dealing with complex test sequences and connections, and evaluating highly integrated optical devices with numerous test ports.
What advancements have been made in automated optical 3D measurement?
Advancements include the development of automated 3D measurement stations and systems, intelligent robotic path planning and guiding systems, and integration with 3D design software for future applications.
What are the limitations of current optical measurement devices?
Current limitations include constraints on incident-reflection direction combinations, the need for optimizing measurement procedures and mechanical design, and the challenge of quantitative analysis of measurement errors.
How is the precision of optical measurement systems being improved?
Improvements are being made by refining device functionality, improving mechanical designs for precise alignment and control, employing error simulation methods like the Monte Carlo method, and optimizing measurement procedures.

I am a seasoned software engineer with over two decades of experience and a deep-rooted background in the optical industry, thanks to a family business. Driven by a passion for developing impactful software solutions, I pride myself on being a dedicated problem solver who strives to transform challenges into opportunities for innovation.
